

How To Repair Fiberglass On Water Softener
At that place are many ways to repair spider cracks in boats, using our Gelcoat Repair Putty is an piece of cake and fast way of doing it!
Outset, you will need to decide your spider cracks are only that, spider cracks. To do so, you will need to inspect the surface area for any sign of broken support. If the surface is steady and looks solid, then y'all have spider cracks.

In order to properly fix any spider cracks, y'all volition have to open up the cracks to fill them up correctly. This can exist washed by using a Dremel. In one case the fissure is open and it has a expert size you can sand and clean the area. For cleaning, y'all may use acetone or soap and water.
Now, you are prepare to use the Gelcoat Putty. Mix in a ane-1/2% ratio of MEK-P Catalyst into the putty and mix it properly. Utilize a putty knife to fill up in the spider cracks. One time dry, sand the surface to a smoothen finish.
Tip: You can apply gelcoat to lucifer the color of your gunkhole over the repair, or you can use our pigments to tint the gelcoat putty and consummate the repair all at once!
Gelcoat does not fully cure without first supplementing information technology with a surfacing amanuensis or wax additive sanding assistance. Gelcoat may be thinned for use in a Portable Preval Sprayer with styrene monomer. You tin can spray it with a polyvinyl booze (PVA) before gelcoat reaches its gel stage (5-10 min.), or adding 1oz per quart of a wax additive sanding aid.
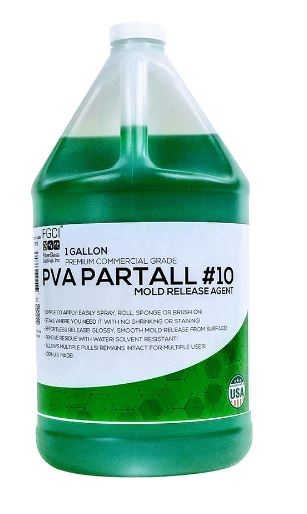
PVA or Partall Picture show #10 is a release agent that helps with removing parts from a mold or can be used as a surfacing agent when using gelcoat without a wax additive (sanding assistance).
PVA is soluble in water making it like shooting fish in a barrel to wash off. Applying can be achieved by spray or wiping the green liquid on with a sponge. It will foam slightly simply dry to a articulate, glossy polish. It tin accept xv-xxx minutes depending on temperature.
For spraying gelcoat our FGCI brand does not recommend thinning.

If thinning is needed, the most cost effective and basic option is Styrene. More often than not, you should not add more than ten% Styrene past book. Patch Booster is an additive that will sparse out gelcoat and non bear on colors. This is added at twenty-25% and the gelcoat volition require catalyst at 2% and then purchase an extra tube and omit wax (sanding aid).
Another thinning alternative is the Duratec High Gloss Additive. This is used with gelcoat for many reasons. Mixed at a fifty/50 ratio this will produce a high gloss finish and will serve as a thinner for your gelcoat, that is why this is commonly used when spraying gelcoat. In add-on, you'll omit any boosted sanding help. After waiting a full 24 hours you tin can buff when cured, for a howdy-gloss employ 600 or higher dust newspaper and buff with Aqua Buff 2000 compound. Buy an actress hardener as your gelcoat will need to be catalyzed at 2%.
Depending on the job at paw, we offer a few types of fiberglass material to choose from and different cloths are used for different jobs. They are available in different widths and are sold past the scroll or yard.
Mat– This mat is used for parts and is great for non showing fiberglass patterns through gelcoat. Mat has many small fibers thrown together on a binder and is the about used, basic cloth. There is no specific direction to the fibers, making them strong and light. Sold in ¾ oz up to two oz thickness.
Woven Roving-This weave has long fibers weaved together like a cloth. It is extremely thick and durable making information technology heavier than other fiberglass materials. This oftentimes shows blueprint through gelcoat and is used for heavy-duty items. Sold in 18 and 24 oz thickness.
-
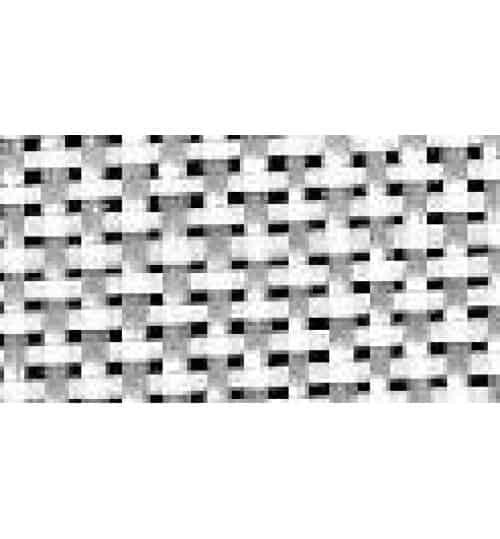
Woven Roving
Double Bias Non Woven- 1808, the first number is the woven roving thickness (18oz) and 08 is the mat thickness (3/4 oz). This is a combination of woven roving on 1 side and mat on the other, making information technology very durable and normally used for boat and house decks equally it is very rigid.
Fiberglass Material– This is sold in 4, 6, eight and 10 oz thickness and is very fine. While existence rigid it is also used for annihilation that is see-through, such as surfboards as it's sparse, lightweight, and shows well with articulate resin.
The finish of your fiberglass pool steps can fade after years of utilise and exposure to puddle chemicals and the weather. If you notice that your pool steps are looking tacky it might be time for you to reapply gelcoat to them.
Yous can utilize Gel Coat if your pool steps currently have gelcoat or bare fiberglass for pool use. We don't recommend the brushable gelcoat in pools considering the chemicals tin affect the gelcoat lifespan.
Meet the commodity ' How to Utilize Gelcoat ' for more details on how to use gelcoat.

Brushable Gelcoat, oftentimes referred to every bit gelcoat pigment, is a specially formulated product that is fabricated to be applied like pigment and eliminate the need for spray equipment. It has excellent leveling, H2o/Osmosis resistance, UV light Stability, corking Gloss Retentiveness, and fantastic long-term durability and is available in a diverseness of colors. Here are some tips for successful brushable gelcoat awarding.
Applying Gelcoat by Brush or Roller – (Use a Brushable Gelcoat) When applying gelcoat by castor or roller, we recommend the Ultra Plus Brushable Gelcoat. (other Gelcoats are all-time practical by Spray) The Ultra Plus Brushable Gelcoat is designed for self-leveling and is a much easier application. It allows for a much smoother finish and less time finishing the gelcoat. Information technology is piece of cake to employ for the "do it your selfers'! Cull a adept pure (natural) resin-resistant bristle brush with tapered ends. Avoid brushes that are either too strong or too soft. For about work, a iii″ or 4″ wide brush will suffice. If there is a trim color, you lot should have a narrow trim brush on paw. Our Brushable Gelcoat comes with MEKP hardener with every purchase, merely y'all may need more which you can purchase as an option depending on the application, temperature, and other environmental factors. Gelcoat needs to be practical evenly. We suggest a thickness of 18-20 mils to properly cure. The thickness of the matchbook cover is approximately 18 mils. If you're not sure how thick information technology is, pick upward a mil guess. This is a simple, easy manner to see the thickness of your gelcoat.
- Don't add Patch Booster or Sanding Aid (wax). You lot don't need to add sanding assistance (wax) to Brushable gelcoat to have it dry tack free. The self-leveling technology added doesn't crave any additional products or additives.
- Proper gelcoat application requires you lot utilize your coats nigh xv-twenty mils thick. We offer mil approximate for purchase.
- Permit the gelcoat to cure overnight and then lightly sand information technology and buff information technology for an outstanding shine!
- Apply Acetone for your cleanup. Just similar other Polyester-based products, Acetone is the best cleanup material!
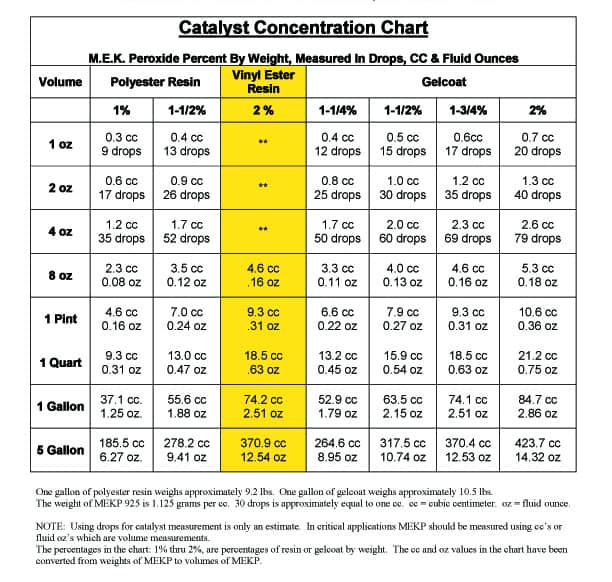
- The virtually important pace: Calculation the proper amount of Catalyst. We recommend i.5%-2% Catalyst ratio. After calculation the goad, you will want to mix for two minutes, preferably with a mechanical agitator (drill mixer). For your reference, here is the goad chart so yous know exactly how much catalyst you lot demand.
Tips
1 mL = 1 ccIf using forest mixing stick, place stick in resin earlier adding catalyst and then wood doesn't absorb catalystOnly catalyze slightly more than than needed. Resin that cures still in the mixing pot is unusable.
Be sure to have a skilful strategy when applying your gelcoat. Once y'all mix and catalyze, y'all have about 15 minutes to apply the gelcoat before it starts getting hard or starts to "gel." The actual working time depends on the amount of catalyst and how hot the working conditions are. Anything below 60 degrees, and your gelcoat will not cure, but as you lot get warmer and warmer, your working time volition subtract quickly. At lxx degrees, you get 15 minutes, but at 90 degrees, you lot only become 5 minutes. If you need more time to piece of work, be sure to sit the can in some cold ice water to cool it down to threescore degrees to allow you a little more than working fourth dimension.
Here are some helpful tips on how to work with brushable gelcoat, peculiarly during the warmer months.
- Cooling the gelcoat, by refrigerating the product to effectually seventy degrees, will give you upwardly to 15 minutes of working time.
- Humidity can be another factor, so, make sure the mold and surrounding area is dry out before applying your brushable gelcoat.
- Make modest batches of gelcoat at a time and catalyze at one ½ % to avoid the cloth from getting hotter. When spraying the gelcoat, brand certain you catalyze at 2 %. If you cull to employ Duratec, please note, the product must be cool equally well.
- If y'all seek to scroll on the gelcoat, the product should be applied evenly at xiv mil thick.
- Do not apply gelcoat in directly sunlight.
A major fiberglass repair, such as patching a pigsty, can be a daunting task. Watching a professional person do the task can help you go on the correct rails and be confident in doing the repair yourself. This step-past-footstep video tutorial produced by Sea Hawk Paints volition bear witness exactly what needs to be done when patching a pigsty in your fiberglass gunkhole.
Note: Before attempting a repair by yourself, get a professional opinion. Always wears Personal Protective Equipment when sanding or working with chemical compounds! Respirator, safety spectacles and gloves are always recommended.
Here is a list of products you lot will need for the repair:
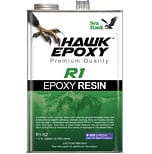
- Hawk Epoxy Resin Kit – It contains the epoxy resin, goad and filler for the job.
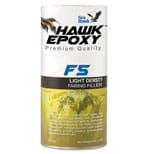
- F5 Lite Density Filler
- Biaxial Fiberglass matting
- 50 grit, 80 grit, and 100 dust sandpaper or grinding pads
Hawk Epoxy Video Tutorial
For more information see these other How To Articles:
Filling a Hole in Fiberglass
How Practice I Cull Hawk Epoxy Catalyst and Fillers?
How to Mix Hawk Epoxy Resin Properly
Fairing Hull Imperfections
 What is the all-time way to achieve maximum adhesion when replacing your boat's hardware? This How To article will give you lot the basic knowledge you need to get your repair done correctly.
Note: Before attempting a repair by yourself, get a professional opinion. Always wears Personal Protective Equipment when sanding or working with chemical compounds!
Hither are some simple steps to follow when bonding hardware to your boat:
- Sand both the surface and the hardware to get maximum adhesion.
- Wet out the surface with Militarist Epoxy.
- Expect a few minutes for information technology to soak in.
- Wet out the Hardware base with Hawk Epoxy.
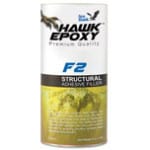
- Mix some other batch of Militarist Epoxy with F2 Structural Adhesive Filler.
- Coat the hardware base, screw threads, and surface mount with the epoxy/filler compound.
- Tighten hardware bolts until some epoxy mixture squeezes out.
- Utilize your finger to fillet the excess mixture around the hardware base for actress strength.
- Before using the hardware, allow the bail to cure overnight.
Hawk Epoxy Video Tutorial
For more than information see these other How To Articles:
How Do I Cull Hawk Epoxy Catalyst and Fillers?
How to Mix Militarist Epoxy Resin Properly
Filling a Hole in Fiberglass
Fairing Hull Imperfections
What is Fairing?
Fairing is process of smoothing out and restoring the damaged surface of the hull. A fairing compound such equally Epoxy resin can be used to fill in divots or gouges then exist sanded to a smooth finish. This restores the surface to its original shape and also prepares it for painting.
Note: Before attempting a repair by yourself, get a professional opinion. Always wears Personal Protective Equipment when sanding or working with chemical compounds!
Here are some guidelines to fairing out imperfections in your hull:
- Sand all loose surface debris and difficult edges.
- Rid surface of debris with clean fabric.
- Moisture out surface with Hawk Epoxy.
- Mix another batch of Hawk Epoxy with F5 Calorie-free Density Filler and apply to repair area.
- Use long strokes to spread out filler compound over the damaged hull. Apply until the mixture is slightly raised above the hull surface. Make certain the compound extends beyond the repair area.
- Allow cure half-dozen hours.
- Add skim coat of F5 Filler / Epoxy compound to reach a very smooth surface. Allow cure.
- Sand the repair to the desired shape with 80 grit sandpaper.
- Stop by applying another ii or three layers of Hawk Epoxy Resin.
- The surface is ready to exist painted!
Hawk Epoxy Video Tutorial
For more information see these other How To Articles:
How Do I Cull Militarist Epoxy Catalyst and Fillers?
How to Mix Hawk Epoxy Resin Properly
Filling a Hole in Fiberglass
How to Get Strong Hardware Adhesion with Hawk Epoxy
Body of water Hawk's Epoxy Pump Kit makes information technology easier than always to measure the Resin to Goad ratio very accurately, and get the same result every single time! But how are the pumps intended to exist used?
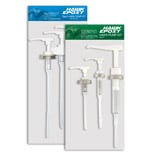 The Pump Kits come in ii sizes, 1 kit all-around the Size one and two Resin and Catalysts, and i kit accommodating the Size 3 Resin and Catalysts. Be sure to get the right size kit for the corporeality of resin and catalyst you plan on using. The Kit contains a full of iii pumps; ane for R1 Resin, one for C2 & C3 Catalyst, and one for C1 & C5 Catalyst.
The Hawk Pump Kit User Transmission and instructional video explain how to use the pumps for authentic measuring, how to prime the pumps, pump cleaning and storage, and how to employ the pumps with various Hawk Epoxy Arrangement Sizes.
Click hither for Hawk Epoxy Size one and 2 User Manual
Click here for Hawk Epoxy Size 3 User Manual
Hawk Epoxy Video Tutorial
R1 Epoxy Resin – a shine, low-viscosity liquid epoxy resin. With a variety of Militarist Epoxy Catalysts, it can be cured under a wide range of temperatures and environmental conditions to form a high strength plastic with superior moisture bulwark characteristics. Militarist Epoxy repair kit is available in four system sizes color coded on each label. Notation: Mix ratios vary by goad. For optimal product utilization, be certain to cull the same Size for both the resin and goad. I.e Size 1 Resin with Size i Catalyst.
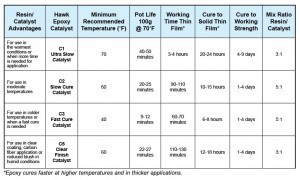
C1 ULTRA SLOW CURE Goad: Designed for employ with Hawk EPOXY R1 Resin for structure and repairs with superior adhesion, strength, bonding, filling, and moisture barrier qualities at higher temperatures and for an ultra slow cure. Do non utilize nether Sea Hawk marine wood varnish.
C2 Irksome CURE Goad: Designed for use with HAWK EPOXY R1 Resin for structure and repairs with superior adhesion, strength, bonding, filling, and moisture barrier qualities at college temperatures and for a tiresome cure. Practice not utilize nether Bounding main Hawk marine wood varnish.
C3 FAST CURE Goad: Designed for utilise with HAWK EPOXY R1 Resin for construction and repairs with superior adhesion, strength, bonding, filling, and wet barrier qualities at cooler temperatures and for a fast cure. Practice not use under Body of water Militarist marine wood varnish.
C5 CLEAR FINISH CATALYST: Designed for use with HAWK EPOXY R1 Resin for very clear fiberglass material and coating applications with exceptional moisture barrier characteristics. Perfect for natural wood and carbon fiber clear coats with no chroma. Longer working times in very warm temperatures. May be used under Ocean Hawk marine forest varnish.
TIP* For easy accurate measuring be sure to use the Hawk Epoxy Pumps that are calibrated to manipulate the correct amount of resin and catalyst. This is much easier and leave little room for mistakes.
Adjacent cull the best Hawk Epoxy Filler depending on the application:
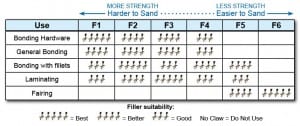
F1 Loftier Load Adhesive Cobweb Filler – Thickens to a light grey colour creating an piece of cake to utilise agglutinative designed for bonding hardware and other applications with dissimilar materials. This mixture will maximize bond forcefulness for anticipated high loads.
F2 Structural Adhesive Filler – Thickens to an off white color, creating a general purpose thickening condiment for bonding, gap filling and filleting. Mix to a workable consistency allowing sag-free and like shooting fish in a barrel catamenia properties for vertical and overhead applications.
F-iii Light Density Agglutinative Micro Fiber Filler – Thickens to an off white color. Bully for bonding many substrates, especially wood. The mixture also creates a multipurpose adhesive for many other substrates in addition to providing excellent substrate wetting and penetrating characteristics. Increases bear on and abrasion resistance.
F4 Bridging Adhesive Filler – Thickens to a brownish color, creating an easy to employ agglutinative with excellent gap filling and filleting qualities. This mixture blends with many different types of woods to allow for a natural looking fillet or gap make full.
F5 Calorie-free Density Fairing Filler – Thickens to a reddish brown color, achieving an like shooting fish in a barrel to sand and cleave fairing compound while still remaining potent and light weight.
F6 MicroSphere Fairing Filler – Thickens to a white color, creating a lightweight fairing chemical compound for minor to large areas. This product holds a feathered edge very well and is suitable for nearly every substrate. This closed celled structure can also exist used for increased acoustic and thermal insulation.
For the easiest way to cull your arrangement, view our Hawk Epoxy Size 1 Kit
Has your boat developed a cicatrice or two? Don't worry too much! A cicatrice is not a serious result. Blisters very rarely get and then bad that they cannot be repaired. You lot tin even repair them yourself!
Needed materials: Acetone, sanding cake, Hawk Epoxy , acid safe disposable brushes.
 Brand sure the blisters are thoroughly drained and grind them deep plenty to remove whatsoever damaged fabric beneath the gelcoat. Increase size of footing surface area every bit needed until all the laminate around the cicatrice is sound. Clean the entire area and allow it fourth dimension to dry.
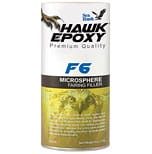 The filler recommended for blister repair is F6 MicroSphere Fairing Filler. F6 MicroSphere Fairing Filler thickens to a white lightweight fairing compound for small to large areas.This creates an easy to sand putty that will aid fill in transitions and hull imperfections. Apply using a putty pocketknife, spatula or trowel. Spread smoothly on the surface in a one/viii″ – one/4″ layer using heavy paw pressure to displace air bubbles/voids. Attempt to force the textile into holes or joints and smooth to the thickness needed.
Before applying the Hawk Epoxy, the hull must exist very dry out. Make sure the hull moisture is under 15% by using a moisture meter. Wipe down the unabridged area with clean rags and acetone. This will remove whatever remaining contaminants on the hull.
Militarist Epoxy is a depression viscosity epoxy organisation that makes fiberglass repair like shooting fish in a barrel for everyone! Equipped with a wide variety of Catalysts and fillers, you can mix upward the exact epoxy batch needed for near any task. For more information on how to mix Hawk Epoxy, click this link. Mix but enough Militarist Epoxy to use in 5-10 minutes. Apply the Hawk Epoxy to the hull using the Curl and Tip method. Use a roller to apply the epoxy and and then apply the tip of a loftier quality brush to smooth the epoxy evenly. The roller should be lint gratuitous and non-wicking. Any fibers that arrive to the epoxy could compromise the integrity of the seal.
Apply the second coat when the offset coat is tacky to the touch. Your finger should leave an imprint but not lift any of the epoxy blanket. Allow the second coat to dry out fully. Once it is completely cured, launder the repaired area with soap and water. The repair is now fix to exist sanded and painted with Bounding main Hawk lesser paint. If redoing the hull apply Tuff Stuff primer, followed by bottom pigment.
If the blister has damaged the fiberglass, that volition demand to exist repaired with fiberglass cloth cut to friction match damaged expanse.
The video below is from Sea Hawk Paints and demonstrates how to seal a fiberglass hull using the Hawk Epoxy System.
Choosing the right resin depends on the type of project y'all are tackling. Listed below are the most common types of resins and their intended uses:
Full general Purpose Repair Epoxy Resin Kit
 Every household should ain a Militarist Epoxy Kit like this. You tin utilize it to repair annihilation around your home or own your boat. This kit comes with the resin, goad and your choice of filler. Just mix them together and you have an first-class bonding, filling, or adhesive paste.
FGCI General Purpose Resin is used for laminating with fiberglass, kevlar and carbon reinforments. Information technology can exist tinted with pigment up to 3% and best results are when used at 70-85 degrees F. Hardener varies depending on thickness of fiberglass, the more fiberglass the less hardener every bit y'all will generate more heat-never go below 1%. Complete cure needs sanding aid added to resin or PVA while still hot.
Polyester Resin:
 Polyester resins are unsaturated resins that are combined with hardeners, such every bit MEKP.
Polyester resin is used more for fiberglass lay-up or if you're going to finish a repair with gelcoat, every bit the polyester resin will bail to the gelcoat better than epoxy. It is also cheaper than epoxy and a keen choice when casting deep molds.
Various Types of Polyester Resin:
Boatyard Polyester Resin is a not-specified resin that contains different types of polyester resins and wax. Boatyard Polyester Resin is not recommended for utilize below the waterline. The textile may cure hard and tack-free due to the included wax. If and so, the product will demand to be sanded prior to adding another layer in club to promote adept bonding.
Clear Casting Polyester Resin is used to cast minor objects into a mold. This method tin exist used to create sculptures, crafts, or industrial prototypes.
Surfboard Polyester Resin is Clear & wax free. It is ideal for building & repairing surfboards because information technology cures to an almost clear color when practical in a motion picture. Besides it highlights underlying graphics.
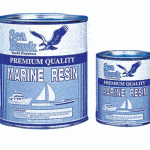
Iso Marine Resin is based on isophthalic acrid. This resin is a step above the general purpose polyester resin and that is reflected in the price. Iso Resin is stronger, more durable, and is the best selection when applying in corrosion environments or elevated temperatures.
Vinyl Ester Resin:
Vinyl ester resins are formulated with a base of polyester resin strengthened with epoxy molecules (a hybrid form of polyester and epoxy and aiding for gelcoat to bond with epoxy) and also use peroxides, such as MEKP, for hardening. These are cheaper than epoxy resins and more than expensive than polyester. Ideal temp for use is 77 F, non practical over 1/8th thickness or it will generate too much heat.
Vinyl esters are more tolerant of stretching, less likely to show stress smashing and more resistant to h2o penetration. Vinyl ester is the pick when improved resistance to moisture is the goal (like repairing a blistered hull).
Long term h2o exposure (hull or water tank) or if affect resistance is important vinyl ester is unremarkably chosen.
Epoxy Resin:
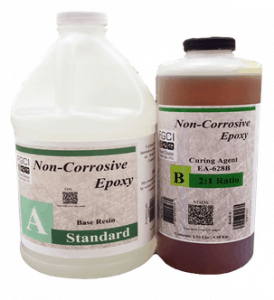 Epoxy resins are cured with the addition of a hardener. Dissimilar the polyester and vinyl ester resins, cured with a small amount of catalyst, epoxy resins usually require a lot more, frequently 1:1 or ii:one. A epoxy resin is the most expensive of these.
Epoxy resin has the best bonding strength as it volition bail dissimilar or already cured materials for stiff, reliable repair work. This is the almost expensive resin but offers the nigh in its power to flex, prevent delamination and ease of repair work.
If doing a repair and not overlaying with gelcoat then the epoxy will perform best as information technology tends to act as a stronger "glue" for the patch to the surrounding surface.
Laminating Epoxy Resin is the correct choice for repairing boats. It is super durable and has high resistance to water. Also, it has very good adhesion to a variety of surfaces including metals, plastics, fiberglass, wood, and drinking glass. The ratio is well suited for utilise with high-solids marine, maintenance blanket and bonding agents. The cure time is three days in the sun or a week if information technology is not. Set time changes with activator and flick thickness. If there is an excessive amount of activator practical , the laminating epoxy will be soft and rubbery. In contrast, if at that place is not enough activator, the epoxy will not cure hard. Laminating Epoxy is available in 3 unlike ratios that provide unlike working and cure times.
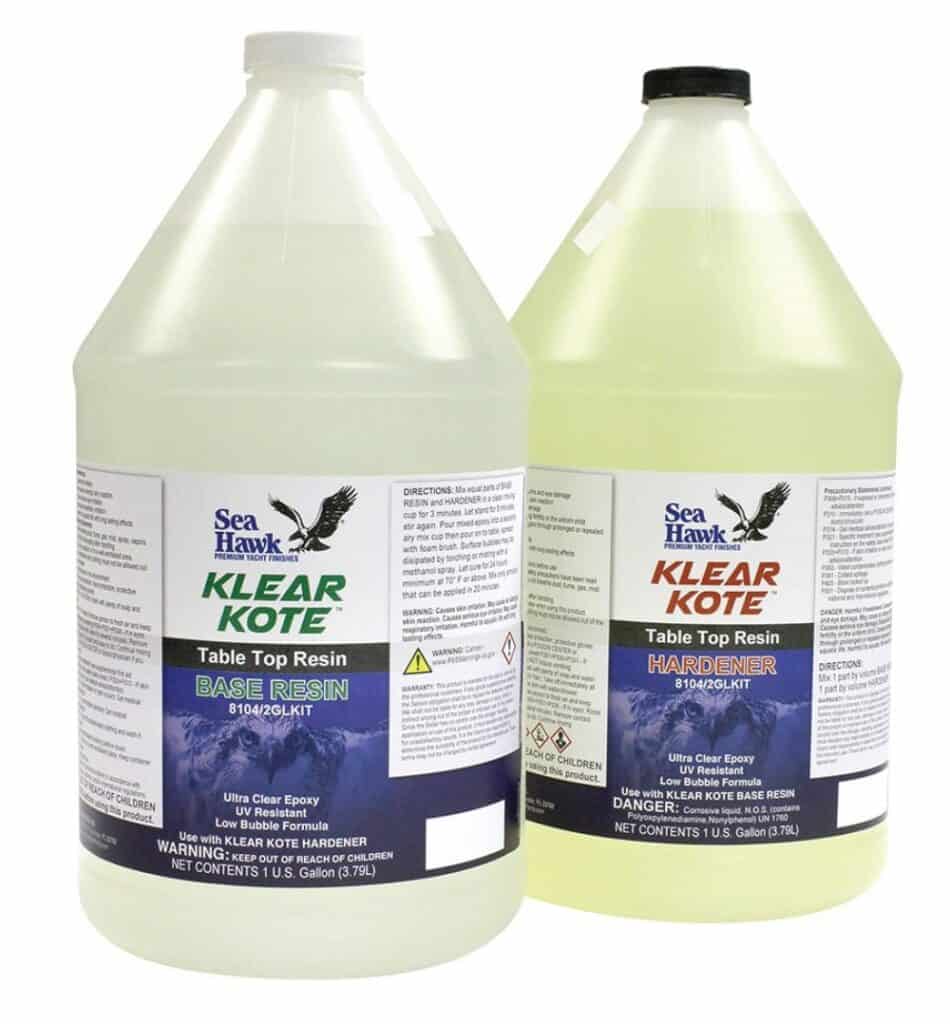
Epoxy Resin (Bar Top Epoxy Resin):
A Premium Commercial Grade Clear Epoxy Resin – Klear Kote Epoxy Resin is used extensively in coating surfaces and in table tops where a clear, hard and durable coating is required. Commonly seen on bar tops and eatery tables. Easy to utilize 1:i mixing ratio of resin and hardener. Items coated with information technology will become permanently preserved and protected for your enjoyment throughout a lifetime. The epoxy resin will not exhibit blushing or sweat out under high humidity conditions.
Epoxy Res in Kits
Epoxy resin kits are sold in ii parts, A and B, which should be applied in two stages. The first stage is referred to equally the seal coat. The seal glaze is brushed on in a thin layer and is used to seal any pores on the surface and prevent air bubbles from forming in the following flood coats. This stage is followed by the flood glaze, which will flow and cocky-level, clean brushes or squeegees can be used to help spread the epoxy. Flood coats are applied in 1/8″ layers at a time, as many as desired can exist practical, however, one to iii coats is average for most table or bar coatings. Resin kits are frequently applied on bar tops and tabletops in many bars and restaurants.
Superbond Standard Epoxy Mucilage
Superbond Standard Epoxy Glue is a two-part, 1:1 epoxy adhesive that has a Vaseline consistency. The product adheres to about everything and is a favorite amidst woodworkers. It'due south offered in a fast curing amanuensis, giving viii-15 minutes of working time; a medium, giving 20-30 minutes, and a standard, offer 30-45 minutes. SuperBond is offered in sizes from ½-pint tubs all the fashion to five-gallon pails.
Rot Cease Epoxy
Rot stop epoxy is a 2-part epoxy that is one:1 ratio and is very simple to mix. The coverage is similar to other epoxies, and like other epoxies, the product does vary in thickness based on temperature. The advantage of Rot Cease is it is NOT affected past wet, making it excellent for deck or flooring and peachy repair, peculiarly moisture damage.
See catalyst chart for mixing guidance:
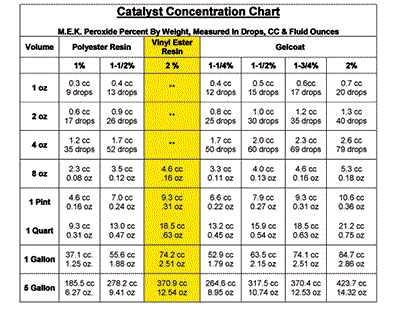
NOTE: Using drops for catalyst is only an estimate. In Disquisitional applications MEKP should exist measure out by using CC's or Fluid Ounces which are book measurements. The percentages in the nautical chart: i% thru two% are percentages of gelcoat by weight.The CC's and OZ's values in the chart have been converted from weight of MEKP to volumes of MEKP.
Resin guns
Gelcoat and resin spray guns are ideal for large surface spraying, such equally new mold construction, composite refinishing and large boat surfaces. Look for a resin gun with a bluish die cast body which volition ensure a long life. Most HVLP loving cup guns utilise nylon flat seal just behind the threads that the air cap attaches to.
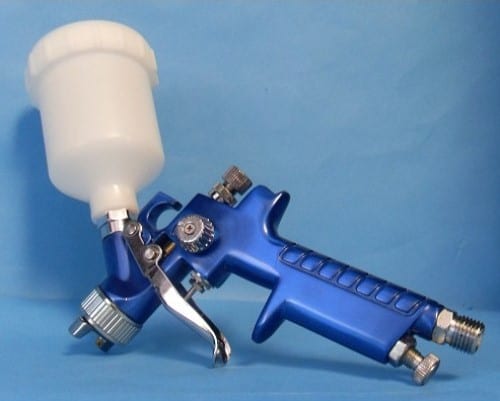
If you accept used a spray gun with a nylon apartment seal simply behind the threads that the air cap attaches to and cleaned it with acetone, the seals disintegrate so it is best to use one with a plastic seal.
Making a Fiberglass Mold
The Plug
In order to accept a class from which to develop your mold, you must either build the article from scratch using forest, plaster, polyester putty, formica, sheet metallic, etc. or yous must have on hand a completed article which y'all wish to indistinguishable. The latter is of course the fastest method. The plug is generally a male model exactly similar the item you wish to fabricate in every particular. If the plug does not accept draft (taper) then y'all will take difficulty getting parts off. If the plug has reverse bends, similar many canoes, then y'all volition need to make a divide mold which tin be spread or taken autonomously.
If the plug contains soft materials on its surface such every bit plaster, wood, or putty, and so it will take to be sealed with lacquer or resin to fill the pores. If plaster is used, information technology must be oven dried and so sealed.
To forbid your mold from sticking to the plug, the plug must exist coated with plastic film known as "PVA." This is a plastic dissolved in booze and has a greenish color. It tin be brushed or sprayed on, just the best system is to spray on three sparse coats, the showtime being a "mist coat." The appearance will then be light-green. Each coat must dry one-half an hour or so and there must be no pools or drips to blemish your mold surface. For the easiest possible parting, earlier applying the PVA, apply a soft wax (TR Mold Release) formulated for utilize with PVA. After the tertiary coat of PVA has dried, a blanket of this wax can be gently applied over information technology for easy parting.
The Mold
The first footstep is to use a gelcoat which volition be the mold surface. The gelcoat must be "exterior gelcoat" (wax gratuitous). If many parts are to be taken off the mold, it is desirable to employ a "tooling gelcoat" which is designed to give longer life in mold use. The gelcoat should be in contrasting colour to the surface of the part you will make. Since most parts are light colored, blackness gelcoat is normally used. This facilitates spraying up a compatible thickness of light colored gelcoat since the black will show through thin spots.
If the gelcoat is to be brushed on, two coats must be applied, and the beginning coat must cure several hours before the second glaze is practical. The best means of gelcoat application is a simple gelcoat gun designed for the purpose and easy to make clean. Air pressure of lxxx to 90 pounds is desirable. Gelcoat must be applied at least 15 mils thick, or a quart to every 25 square anxiety of surface. If the plug was rough and so that considerable sanding of the gelcoat volition exist necessary, then double the application. Before applying the gelcoat, it must of course, be catalyzed with MEKp peroxide hardener, using from one to two percent. All gelcoats from the Bottom Paint Store include the MEKp.
When the gelcoat has cured then that it cannot be scratched off with the fingernail at the edge of the mold, which takes from 2 to 4 hours to overnight in cool or boiling atmospheric condition, you are ready for the "skin glaze." This is a layer of ¾ or 1oz. fiberglass mat , thin enough so yous tin see and remove all air bubbling entrapped by the resin when you "moisture-out" the mat. The resin should exist applied with a mohair roller or castor until no white fibers remain. Any air bubbles are so eliminated with a grooved plastic or metal laminating roller. The polyester resin used should be "lay-up resin," which is wax-complimentary. Be careful not to over-catalyze when laying up the glass. Above 75°F one 10-15 cc of hardener to the quart will generally suffice. Below 70°F, 20 cc per quart. Do not work below 65°F.
In laying up a fiberglass mold, warping can be avoided by allowing each layer to "kicking" or gel before proceeding with the next layer. For a large mold, it is good to utilise simply i layer per day. After the "skin glaze," you can utilise ane½ oz. fiberglass mat for a faster build-upward. Generally, woven roving is non used in molds because the pattern transfers through the mold to the gelcoat. If it is necessary to utilise woven roving fiberglass for forcefulness in a large mold, it is applied afterward a thickness of 3 or four layers of mat has cured hard. The thickness required in a mold depends upon size and shape and the number of parts to be taken off. For a dinghy mold to be used only a few times, four layers of mat might be acceptable.
Removing mold from the plug
Allow mold to cure several days if possible so it will concur its shape. The beginning stride is to trim the excess laminate back to the molded edge. This is easily done with a saber saw and a metal-cutting blade. The edges are sanded carefully until the line between the mold and plug is exposed. Then a sharpened "tongue stick" is forced betwixt mold and plug to separate the edges. The stick is then pulled clear effectually the plug until all edges are free and no bridges remain. Avoid using metal tools for this purpose equally they will scratch the mold surface. Then the mold should pull complimentary of the plug. If not, the parts tin can be flexed or pounded gently with a rubber mallet. If necessary, air or h2o can be forced under pressure between plug and mold. A hole can exist drilled through the interface for this purpose. PVA is h2o soluble, which facilitates departing with water pressure.
Polishing the mold
Depending upon the status of the mold surface, it may have to be sanded with 220 grit working up to 600 grit wet or dry. The surface is and so compounded with regular and fine finish compound formulated for fiberglass work. Best results can be achieved by using special compounds such as 3M Finesse-It Marine Paste Compound to bring out a mirror finish.
Before using a mold, it should be allowed to cure a calendar week or more if possible. Be certain to utilise PVA parting motion picture and soft wax for the first iii or 4 parts, after which a carnauba wax tin exist used.
Gelcoat problems
Alligatoring, or wrinkling, tin upshot from:
ane. Gelcoat too thin in some spots
2. Insufficient hardener, or hardener not mixed will enough.
three. Gelcoat not cured long enough before mat lay-up.
4. Acetone cleaner drips out of roller or castor during mat lay-upward.
Original technical commodity provided by Fiberglass Coatings.

Source: https://www.bottompaintstore.com/blog/category/fiberglass-repair/
Posted by: mcateeexhaf1999.blogspot.com
0 Response to "How To Repair Fiberglass On Water Softener"
Post a Comment